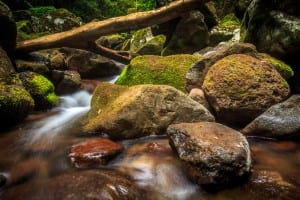
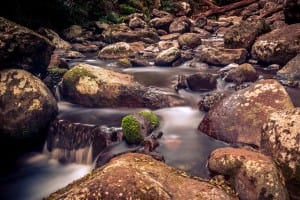
In this article we talk about how to photograph waterfalls. Waterfalls are among the most popular subjects for landscape photographers, but there are a few tricks that you can use to help capture that perfect shot. One of the questions I am most asked is; “How did you make the water look like that?”. In this article, I will share some information, tips and tricks that you can use to capture your own majestic waterfall photos.
Equipment
Firstly, you don’t need expensive gear. Lets start by looking at some of the equipment commonly used when talking about how to photograph waterfalls.
- Camera – Any camera that has the ability to manually set the ISO, Aperture, and Shutter Speed will work
- Tripod – Because we’ll be working with slow exposures, A tripod is going to be essential. It stops your camera from moving and shaking while taking the photo.
- Remote/Cable Release – This allows you to trip the shutter without having to touch the camera. If you don’t have a cable release, you can use the built-in timer on your camera.
While not essential, the equipment listed below will make your life easier and can work to create some breathtaking images.
- Filters – Neutral Density, Graduated Neutral Density, and Polarizing Filters work brilliantly with all landscape photography. I will cover what each of these do in another article.
- Weather Proofing – High end cameras and lenses like the Canon 5D and L Series lenses are weather-sealed. This means you position yourself in the flow of water without having to worry about water splashing onto your camera and potentially damaging your equipment. (NOTE: Keep in mind that your Lens will only be completely sealed with the addition of a UV filter or similar).
- Lens Hood – Cheap and Versatile. Lens hood’s help eliminate flaring from the sun.
Location
We’re going to need some waterfalls to start shooting. There are an abundance of these scattered all over Queensland, Australia; you just need to know where to look. A quick Google search will give you some results, but I prefer to get off the beaten track and find some images that wouldn’t have been captured a thousand times already. This often involves climbing over extremely slippery rocks, wading through ice cold water, and a hint of creativity.
O’Reillys Rainforest Retreat is a perfect place to start. It’s located about 2 hours from Brisbane and the Gold Coast in Lamington National Park and offers a vast selection of tracks, trails and waterfalls to explore at your leisure. The Box Circuit is a great trail for beginners that stretches only 11kms and has plenty of falls along the way. The entrance to the circuit is located directly across from the O’Reillys Reception.
Time of Day
Waterfalls benefit from light earlier in the morning, or later in the afternoon. Cloudy and overcast days can also be beneficial as the waterfalls aren’t tainted with harsh, blown out highlights. When the sun is lower, the light produced is softer. Take your time to assess the composition and check for highlights and/or harsh shadows. If you are photographing on a cloudy day, get your shot ready and wait until cloud cover provides soft, even lighting across the scene. You will notice the difference.
Exposure and Aperture
Now we’re looking at the nuts and bolts of it all. To capture that slow, silky smooth water, we need to use a slow shutter speed. To do this, we need to restrict the amount of light entering the camera. First, lets set our ISO to 100. This will help us a number of ways, It will prevent unwanted noise, and also help keep our shutter speed down.
The aperture should be quite small. Personally, I like using an f-stop of 10-16 depending on lighting conditions. We will set our shutter speed based off these parameters. Usually with no filters, you’ll probably still only get a shutter speed of ~0.8-1.0s on a particularly bright day. This is where ND filters really shine. They can be stacked on your lens and work to significantly reduce light entering the camera. This allows us to get much longer shutter speeds we typically wouldn’t be able to achieve. Circular Polarizing filters (CPL) provide a couple of benefits. The reduce the amount of light entering the camera by 3 stops, but can also be manipulated by twisting the dial to remove glare and sheen from the surface of water giving you a much richer, vibrant photograph. These are relatively inexpensive and can be picked up at most camera stores.
Lens Choice
You can practically use any lens you own when learning how to photograph waterfalls. Ultra Wide (UWA) lenses will give you a much wider perspective bring objects much closer into the scene, where as telephoto lenses will compress the image and give it a magnificent layered effect. The choice is ultimately yours.
Final Thoughts
Remember to stay creative. There is no right or wrong way to photograph waterfalls, this is merely my preferred method on how to photograph waterfalls. There are plenty of other tips you can incorporate into your waterfall photography including fill flash, High Dynamic Range (HDR), Exposure Blending and I will go over these in more detail in future articles.
Keep in mind that Safety is extremely important around waterfalls, slippery rocks, cliffs and drops. Adhere to posted signs and travel with a friend. A first-aid kit is often recommended and as I found out first hand, if you don’t like leeches – keep your feet out of the water.
If you have any questions, or suggestions of your own, I’d love to hear from you by leaving a comment below or getting in touch via the contact page.
Updated 03 July 2019


